Creating a smart vegetable garden: do-it-yourself raised beds

Every year the number of fans of raised beds increases, the many variations of names of which speak for themselves about their quality content: warm, compost, raised beds.
Content:
- Benefits of raised beds
- Recommendations for optimal placement
- How to build raised beds with your own hands
Benefits of raised beds
The ideal place for growing vegetable and fruit crops, as well as berries, is raised beds, which have much greater advantages than ordinary ones:
- Usage purchased soil guarantees that there is no lack of soil in the dacha plot
- Excellent drainage guaranteed
- Purchased soil protects plants, saving them from weeds, fungus, and rot.
- Raised beds are most convenient for caring for plants and harvesting crops
- Help increase and maintain harvests in regions with an unfavorable climate for farming
- The small area of tall vegetable gardens and flower beds allows you to get a richer harvest
- Largest warming up the soil, which allows you to speed up the planting of seedlings in the ground, and, as a result, earlier ripening of vegetables, fruits, berries
- You can make your own garden beds in just a few hours.
- Depending on the material used in production, the creation of both budget and prestigious options
Recommendations for optimal placement

The construction of bulk beds is possible on any site.To create the optimal design option for this method of gardening, it can be presented in the format: beds - greenhouses and the “no digging” method.
The design of a greenhouse bed is especially relevant in the spring when the ground is frozen, when ordinary greenhouses are not yet ready to receive seedlings. In a high bed, the soil is much warmer due to the height of the top layer of soil. When creating a “pie” based on a high bed, that is, a warm one, the gardener is guaranteed to receive an early harvest.
The procedure is very simple:
- The bottom layer is covered with geotextile
- Next - sand, mown grass, a rag, old newspapers or any other paper
- Then - peat layer
- Everything is covered with earth from above
Watering abundantly with hot water and then fixing the film on the ground to warm it up
The “no digging” method allows you to get an enviable harvest without digging up the soil on high ridges. The idea behind this idea is that the soil is not “disturbed” by digging up the soil, turning it over and breaking up the clods. It is not recommended to even step on the ground.
Work with soil only at the time of planting seedlings, seeds and collecting vegetables and fruits. It is necessary to regularly enrich the soil with organic matter, which improves the structure of the soil and saturates it with microorganisms.
The “no digging” method for raised beds almost completely replaces weeding with mulching.
The usual underground vegetable garden smoothly turns into a high superstructure above the ground. Gardeners create raised beds with their own hands, placing layers of mulch and compost on the surface of the ground. When organic matter decomposes, providing plants with moisture, maintaining heat balance, supplying growing crops with necessary nutrients.That is, ideal conditions are created when microorganisms and worms in the soil increase several times, and the soil is fertile for a long time and retains moisture remarkably.
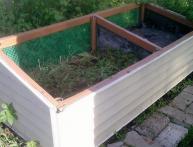
How to build raised beds with your own hands
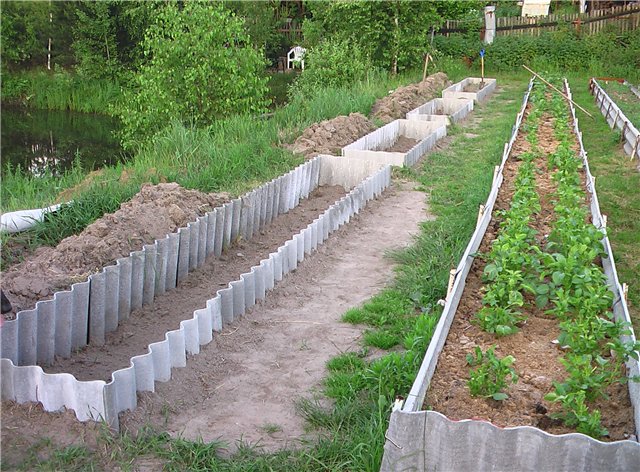
Choose a place; an unused part of the lawn, an overgrown wasteland, or a compacted area of soil is suitable for a high ridge. It is advisable that the selected area be illuminated by the sun for at least five hours a day.
Remove inorganic debris weed roots, and there is no need to remove the grass. For better moisture permeability, you can dig up the ground with grass once.
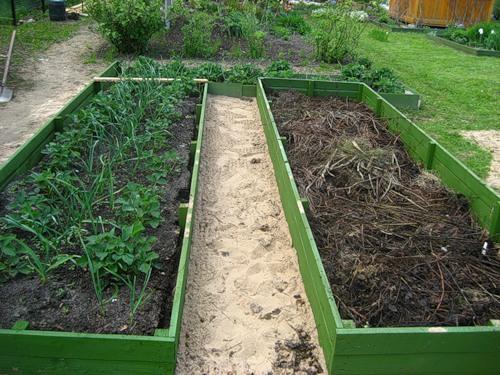
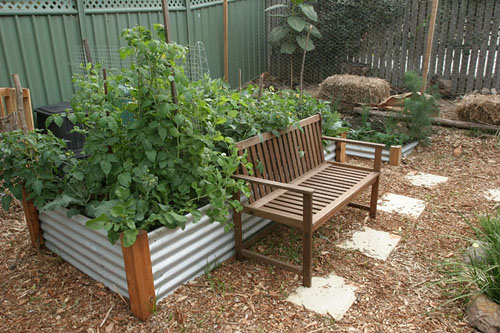
Install barriers around the perimeter of the future ridge: shields made of wood or plastic, you can use ordinary boards, bricks, etc. Estimated height – up to thirty cm.
The next stage is laying layers of organic matter.
The bottom layer (up to ten cm) is waterproof coarse material (last year's leaves, dry branches mixed with straw, tree bark, you can add shavings and wood chips).
Next comes the laying of fertilizer. They can serve as compost, manure, which must be rotted.
Both layers are repeated twice in the installation. You can add mineral fertilizers. You cannot mix layers by digging up the soil. It is important!
The last top layer is good soil (10 cm).
The bed is watered abundantly and left alone for several days to soak and settle. It is recommended to leave the bed under a fixed cover of black material for several days. This can be plastic film or waterproof material. The best heating of the high bed is ensured.
The garden bed is built! All you have to do is wait and be amazed at the effectiveness of your construction.
Video instructions for creating raised beds with your own hands:
Interesting information about the vegetable garden


Comments
I wouldn't use old newspapers or paper. Printing ink contains a huge amount of heavy metals.
There is one danger when arranging high beds - if you make high sides, you can limit pollination by bees! I have already tested this in my own experience. And antifungal treatment of boards is mandatory if they are used!
We bought the beds, they were immediately treated with an antiseptic, which protects against fungus. It's good when everything is thought out for you))
They fit perfectly into the dacha plot; if anyone is interested, go to the Gryadki.Online website.