Growing tomato seedlings at home: your own tomato sprout to fruit
Growing vegetable seedlings is again at its peak in popularity. Firstly, having your own vegetable means confidence in its environmental purity. Secondly, significant cost savings. And, thirdly, there is a real opportunity to transfer this business from amateur to professional and organize your own small business.
Content:
- Seed selection is the first and main stage
- What should the substrate be?
- Containers for growing seedlings
- Care and watering
Seed selection is the first and main stage
The beginning of all plant origins is seeds. The yield of future tomatoes and their susceptibility or immunity to diseases directly depend on their quality.
Seed material, which, in the literal sense of the word, lies in bundles in markets and stores, must be assessed not only by the attractiveness of the packaging. The quality of the seeds is checked in a laboratory, and how much the manufacturer has not stinted in subjecting the product to professional testing depends solely on his integrity. The average consumer can only trust the information on the packaging.
High-quality seeds must have:
- High percentage of germination
- Cleanliness (minimal contamination with impurities)
- Required percentage of humidity (within 4-8)
To test the germination of “home-produced” seeds (and from packaging too), you can use two methods:
- Salt water method.For high-quality sorting, place tomato seeds in a solution of ordinary table salt (1 teaspoon per glass of water), stir and let stand for 10 minutes. The lightest of the seeds - half-empty and dried - will float during this time, while the full-weight ones will remain at the bottom.
- Ebonite stick method. Place the seeds evenly on a sheet of paper and pass an electrified ebonite stick over them - it will attract low-quality seedlings.
How to prepare seeds for sowing

Ways preparation for sowing several, they all have the same efficiency and there is absolutely no difference which one to choose - the main task of the process is to ensure that the seeds receive a sufficient amount of moisture, swell and “bend”.
The methods are:
- Soak
- Germination
- Etching
When choosing to sow purchased tomato seeds, it is not necessary to treat them; this has already been done under production conditions. But it won’t hurt to treat varietal seedlings from your garden. For etching you need a weak pink solution of potassium permanganate (1 g per 100 ml of water), cotton pads and 30 minutes of time: wrap the seeds in cotton wool and place in the solution. After processing, rinse in clean running water.
Immediately before planting in the ground, the seed material must be soaked, placed between layers of moistened fabric. You can soak it either in clean water or in solutions with added stimulants. The option with stimulants will cost a little more, but the yield of processed tomatoes should increase by at least a quarter.
There is another way to prepare seeds - hardening.This is for the case when you are going to grow seedlings in greenhouses placed directly in the garden - practically in open ground and they may be at risk of spring temperature instability.
Hardening is traditionally carried out as follows: after soaking, the seeds are placed in fabric bags and left in a cool place where the temperature does not exceed +20 ... +50. After keeping the seeds in the cold for two days, they are placed at room temperature for a day, then again in the refrigerator.
What should the substrate be?
A huge advantage of home-grown tomato seedlings is that they are undemanding to the soil. This does not mean that it is not at all picky and can grow in anything, even clay. No. Acceptable conditions for seeds it is necessary to create, but even if there is some discrepancy with the requirements, the tomato seedlings will withstand it with honor. Acidic soil, dryish soil, with insufficient fertilizers - tomatoes can withstand all these troubles
But every self-respecting gardener tries to prepare the most “comfortable” soil mixture for seedlings. It's not as difficult as it might seem, and the components can be found in almost every rural yard:
- Sod land (1 part)
- Humus (1 part)
- Compost (1 part)
- Loam or sand (0.5 parts)
Home-made soil must be disinfected before planting seeds, so as not to expose future sprouts to the risk of various diseases.
Two known processing methods:
- Freezing (prepare the substrate in the fall and leave it outside under a canopy for the whole winter to freeze).
- Steaming (to do this, you need to build a “steamer” from a bucket and a colander: pour water into the bucket so that it does not reach the bottom of the colander, cover the colander with several layers of gauze, pour in soil, put the structure on the fire and “cook” for about an hour).
If you simply pour boiling water over the soil, it will not give the desired effect: with hot water you can easily wash out all the microelements and “cook” beneficial microorganisms. So you'll have to make a double boiler. If you don’t want to bother with buckets, you can simply bake the soil in the oven or buy a ready-made disinfected substrate.
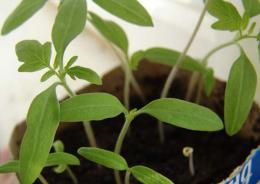
Containers for growing seedlings
Growing seedlings at home requires a wide selection of containers, and they can be very diverse in shape and material - that is, you can use any boxes that come to hand. Usually these are cardboard packaging for milk and juices, such as Tetra-Pak, plastic in which you bought a cake for a celebration, or even ordinary plastic glasses or bottles cut in half.
When using milk and kefir packaging, gardeners need to be extremely careful: unwashed milk may remain in the corners of the packages, which can contaminate the soil with the ubiquitous lactic acid bacteria. This will cause mold and further problems with the “health” of the seedlings.
Therefore, it is more logical and safer to use another type of accessible container - plastic boxes for dry confectionery products (cookies, waffles). Prepare boxes for seedlings It’s elementary: punch small holes in the bottom of the containers to drain excess water, fill it with soil, water it with a weak solution of potassium permanganate and plant the seeds.
The finished containers should be placed in trays, covered with cling film and placed in a bright place at a temperature of +16...18 degrees. An excellent place for seedlings is an insulated veranda with large windows or glass walls. The main thing is that seeds and sprouts should receive moisture, light and warmth.
Care and watering
The first days after planting in the ground, you don’t even have to go near the boxes with seeds - they have everything you need. The condensation that collects on the “ceiling” of the film serves as “irrigation”; a certain temperature is maintained under the film, due to the fact that the container is exposed “in the sun.”
You should start paying attention to the sprouts after they emerge from the ground and begin an intensive period of development above ground. During the day, it is necessary to free the young seedlings from the film - they must “breathe”, and at night, cover the boxes again to maintain the optimal temperature.
Water the seedlings once every 5-7 days, make sure that the sprouts have enough light, otherwise they will begin to turn pale and stretch out. The air in the room with seedlings should be fresh and clean, but drafts should not be allowed, which can destroy all your work.
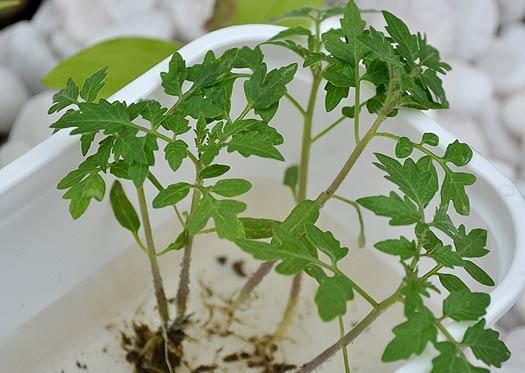
Picking up tomato seedlings
The moment when three full leaves appear on the sprouts is very significant. It's time to plant the seedlings, that is, transplant them from the common into separate containers.
Some gardeners consider picking to be Sisyphean work and transplant plants from a large box directly into open ground, some from the very beginning distribute the seedlings into separate glasses, but most adhere to traditions and pick seedlings according to all the rules.
And the rules are:
- Prepare cups with drainage holes
- Fill the container with soil and compact it slightly.
- Carefully remove the sprouts from the box (one at a time)
- Pinch the root before diving
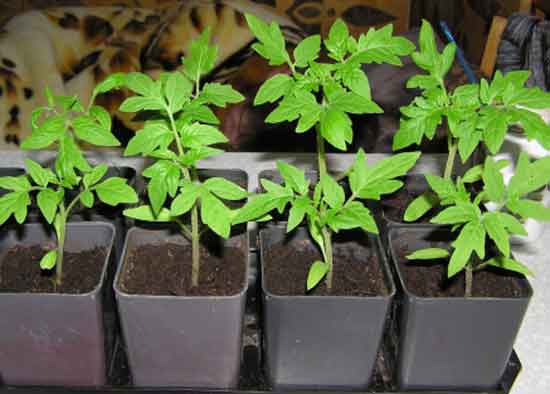
For plant acclimatization It is necessary to increase the room temperature by 2-3 degrees and keep the tomato sprouts in this climate for 3-4 days. This will be enough for the seedlings to “get used” to the fact of their separate growth. The temperature can then be lowered
and start feeding and hardening the seedlings.
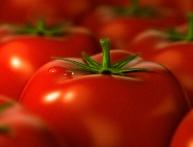
There is nothing complicated about the rules for growing high-quality seedlings. Ease of care, availability of seed, and its correct choice result in an excellent result - a lot of tasty and healthy homemade tomatoes, which in the skillful hands of the owner turn into salad, borscht, and homemade ketchup.
Useful video about sowing tomato seeds for seedlings:

Interesting information about the vegetable garden

Comments
I use my own seeds - they have already been tested and are also late blight resistant. I try to care for it correctly, but it still happens that several pieces do not sprout. As they say, “Live and learn.”
I also plant half of the tomato seedlings from my own seeds. But I like to experiment with new varieties. Sometimes they then cross-pollinate with “domestic” ones and interesting hybrids are obtained.