Do-it-yourself fireplace construction: step-by-step construction

The fireplace not only performs a decorative function in the interior. This heating device allows you to save on utility costs. There are a variety of designs in style and purpose. You can buy a ready-made fireplace or build one yourself, spending a small amount of money.
Content:
- Fireplace in the house: main functions and purpose
- Preparatory work for installing a fireplace
- Required materials for installation
- Construction of a fireplace from timber: step-by-step instructions
Fireplace in the house: main functions and purpose
Initially, a fireplace in a country house was used to heat the building. They are not currently considered as a heating method. It's more like an element decor, which creates a cozy and warm atmosphere in the room. Fireplaces can be open or closed.
Efficiency depends on appearance. It is quite difficult to control the strength of fire in an open fireplace, and it requires high fuel consumption. When installing such a fireplace, the room will quickly overheat, and when the flame begins to die out, the heat will decrease. Such fireplaces are very dangerous: if a spark hits the floor, a fire can occur.
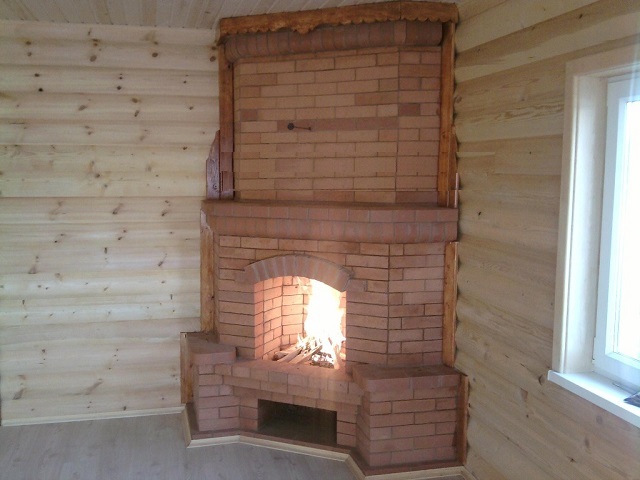
A closed fireplace is safer and more economical. This type allows you to control the temperature and save firewood. The classic type of fireplace that is most often found is wood-burning. This is a kind of home. Firewood for the fireplace is an environmentally friendly material and does not cause any harm to the residents of the house.
Preparatory work for installing a fireplace
Before you start building a fireplace, you can order or create your own stove layout. When drawing up a drawing, it is necessary to make calculations. First you need to measure the room where the fireplace will be located. If the living room is 15 square meters in size and the ceiling height is 3.5 meters, then the volume of the room will be 52.5 m3.
Next, draw a diagram, observing the scale. The inside of the firebox should be 1:45-1:65 of the area of the entire room. The depth of the combustion part is no more than half 2/3 of the length of the combustion opening. If you make the firebox too deep, then the efficiency level decreases, but if it is not deep, then smoke will enter the room.
The optimal size of the chimney pipe is about 5 meters, and its diameter should be at least 10 cm. To determine the size of the chimney opening, you should calculate the area of the firebox. It should be taken into account that the size of the chimney should be 8 times less than the area of the combustion space.
Required materials for installation
After all the calculations have been made and the drawing has been drawn up, you can prepare tools and materials. To work you will need:
- Bricks
- Purified river sand
- Kiln clay
- Cement
- Crushed stone
- Reinforcement (length 70 cm, width 8-10 mm)
Bricks should be solid with clear edges. There should be no debris in the sand and it is better to take it in a fraction of 0.2 to 1.5 mm. If there is debris, fill the sand with water and then drain it. Carry out the procedure until the sand becomes clean and light.
You can take Cambrian clay, but if you have experience working with kiln clay, then use that too. The following tools must be prepared: tape measure, plumb bob, spatula, grinder, trowel and container for cement mortar.
Fireplace construction: step-by-step instructions
Foundation construction. The stove must not be placed on the same foundation as the building. Thickness foundation for a fireplace should be 5-6 cm larger than the size of the basement row. You need to dig a pit to a depth of about 60 cm. In this case, the width should be 10-15 cm larger than the future foundation. Place crushed stone in a layer of about 10 cm at the bottom of the hole and compact it. A building level is used for leveling. Next, use boards to knock down the formwork to the required height.
Treat the inner surface with roofing felt, bitumen or glassine. Then place the formwork on the base and lay large stones on the bottom. Fill the space between them with crushed stone and fill it with cement mortar. After this, carefully level the surface, check it with a level and cover it with polyethylene on top. The solution hardens within 7-10 days. After this period, you can begin laying bricks.
The process of installing a fireplace. A couple of days before starting work, you need to soak the clay and, as it thickens, add water and stir until a homogeneous mass is obtained. The bricks are also prepared at this time. For work, use only plain and even bricks. They should first be cleaned and rubbed against each other.
To increase the strength of the structure, immerse the bricks in water to release air bubbles. This will avoid absorption of moisture from the prepared solution. Next, spread waterproofing material in two layers on the surface of the foundation.
Place the brick on the batten, press it, then cover it with mortar and nail it in, patting it lightly. It is necessary to carry out the work carefully and ensure that clay does not appear through the cracks. The bricks of the bottom row are laid on edge.You should not forget to control the geometric dimensions with a square and the horizontal row with a level.
During construction, it is important that the fireplace does not come into contact with external walls. This will avoid fluctuations temperature.
Laying the chimney and vault. They are usually made curved and laid with overlapping rows of 5-6 cm. The portal hole must be blocked using jumpers. They are installed in the form of an arch, wedge or vault.
It is necessary to erect the formwork and support it, then lay the support heels and install the central brick. In the future, masonry is carried out simultaneously on both sides.
Cement mortar is used for laying the chimney. An inlet must be made where the pipe exits. This will help protect the wood from open flames. At the final stage, install a smoke chamber above the firebox. To prevent soot and sparks from flying out of the fireplace, a protruding cornice is made between the chamber and the firebox.
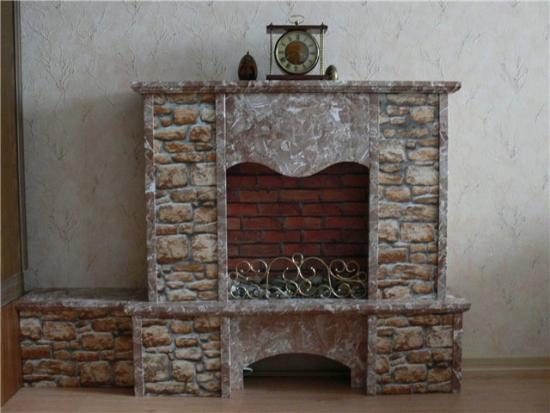
Upon completion of work, wipe the firebox along with the smoke collector from the inside with a cloth, removing any remaining solution. It should be remembered that there is no need to plaster the inside of the structure. In the future, the fireplace can be decorated according to your own wishes, taking into account the interior of the room. Brick fireplace with your own hands It’s not difficult to do, you need to follow the sequence and carry out the work according to the drawing.
Video on how to make a fireplace with your own hands: