Secrets of growing grape cuttings at home
Growing grapes in cold regions of Russia became possible with the advent of winter-hardy varieties. Its berries began to ripen at an average daily temperature of up to + 18 degrees, for 100 days. You can grow a heat-loving plant in cool, short summer conditions near Chelyabinsk, Moscow, Pskov, and Vologda. Where loamy or sandy soils do not warm up well, and summers can be cold and rainy.
It is not always possible to buy the right variety for open ground. It’s easier to find and get the cutting you need. It is not difficult even for a novice winegrower to turn a cutting into a fruit-bearing vine. You can grow grape cuttings at home; it is important to prepare them in time in the autumn and keep them alive in winter.
Content:
- Preparation and storage of cuttings
- Transfer to heat, kilching
- Methods of rooting and growing rooted cuttings
Preparation and storage of cuttings
Harvesting grape cuttings needed in the autumn. Harvesting time depends on the onset of the first frost. Since grape buds are easily damaged and die, and on the cuttings they must be healthy and undamaged, it is better to start harvesting in early autumn.
To obtain cuttings, you need to choose healthy mother bushes of a variety that is promising and productive in the area.
For cutting cuttings, the ripened part of the vine is used; it differs in the color of the bark from the green, unripe shoot.The length of the cutting depends on the number of internodes. The smallest number is 3 - 4, the maximum is up to 8. The optimal thickness is from 0.7 cm to 1 cm, length - 20-40 cm. The bark should be intact, without mechanical damage. Select cuttings that are straight, without bends or signs of disease.
It is better to start processing and preparing the cut material immediately after cutting, this will help avoid illness and death.
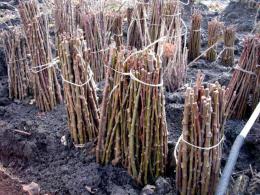
Preparing cuttings for storage in winter:
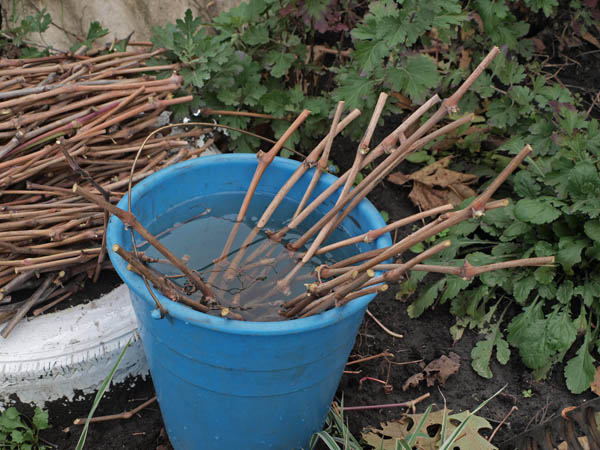
- stand in water for a day
- soak for half an hour in a solution of vitriol or potassium permanganate
- dry on paper towels
- wrap tightly in film and bandage
- attach a tag with the name of the variety and date of packaging
Prepared this way cuttings must be kept alive all winter. This can be done at temperatures from + 1 to +5 degrees. Suitable for this:
- fridge
- loggia
- cellar
The condition of the cuttings should be checked once a month. If drying is observed, place them in water, dry them again and pack them. If mold appears, wipe the affected areas with a solution of potassium permanganate.
You can also save them by burying them in the garden plot to a depth of forty centimeters. Around mid-February, the grapes enter the physiological phase of forced dormancy. At above-zero temperatures, its rapid awakening begins. This is the best time to grow cuttings at home.
Transfer to heat, kilching

After winter dormancy period, the cuttings are brought into a warm room and unpacked. After that:
- disinfection in potassium permanganate
- rinsing in clean (running) water
- cutting the lower tip 0.5 - 2 cm from the outer bud, with a straight cut
- circumcision above the upper bud, oblique cut
- soaking in a stimulant solution for two days
A solution of honey, aloe juice, or humate can be a stimulant for soaking. Approximately one large spoon per ten-liter bucket of water. The top of the cutting must be treated with garden varnish or special paraffin.
To stimulate the process of root formation, in the lower part we make several vertical grooves with a clean knife, right along the lower internode. Sprinkle the cuts with heteroaxin. For varieties that are difficult to root, it can even be lightly rubbed into the grooves. It is on the “wounded” part of the cutting that callus (callus) is formed - a root callus formed by plant tissue, which ensures the further process of root formation.
When growing cuttings at home, the buds may bloom much earlier than callus forms and root growth begins.
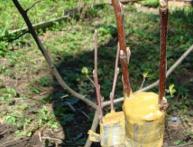
With absence root system, the leaves lack nutrients and die. To speed up root growth and slow down the opening of buds, kilching is used, placing the root part in a warm environment and the apical part in a cool environment. At home, this can be done using plastic bottles filled with warm and cold water.
The lower part should be wrapped in a cloth that has been well moistened in warm water and the whole thing should be wrapped in film. Simply wrap the top part with film. Place a bottle of warm water +30 degrees into the box on one side, freeze the second bottle of water, and place it on the other side. Place the wrapped cuttings with the root part on a warm bottle and the top part on a cold bottle.
Cover everything with loose sawdust and cover with a lid. Maintain the temperature in the root part at +26 degrees, changing the water to warm. After three days, unfold the lower part and inspect it. Select those cuttings on which a white ring-shaped influx appears.The appearance of a bead on the cut and the appearance of root tubercles allows you to begin further rooting. Leave the rest for further kilching.
Methods of rooting and growing rooted cuttings
There are three options for rooting grape cuttings at home.
R.P. method Radchevsky - in containers with water
Need water:
- snowy
- rain
- melting
- boiled
We pour it into glass or plastic containers to a depth of 2 - 3 cm. We place no more than a dozen cuttings in it. You can put a plastic bag on top to retain moisture. We place the jar on the windowsill of a south or southwest window.
After a couple of weeks, the shoots will begin to grow, and at the same time or a few days later, the roots will begin to grow. With this method, as a rule, death of shoots not visible. But it is important to know that if, after the first shoot, the second one begins to grow, but the roots have not grown, then one of them must be removed; there will not be enough nutrients in the cutting for two. The stronger one is removed from the shoots. As soon as the roots grow, the cutting is moved into the ground for growing. This must be done with the utmost care, without breaking the fragile roots.
Growing "on the closet" according to the method of N. L. Puzenko
To do this method, you need to take an old towel or cloth and moisten it with water. Then wrap each cutting one by one: lay it down, wrap it up, lay the next one down - wrap it up, and so on until the end.
The tops remain free. A film was secured over the fabric. We place the wrapped petioles on the cabinet or refrigerator, turning their tops towards the light source (window). If necessary, spray the fabric once every few days. After 15 - 25 days, roots will appear.It is important not to overcook them and plant them for rooting in the ground when they reach a size of 2 - 3 mm.
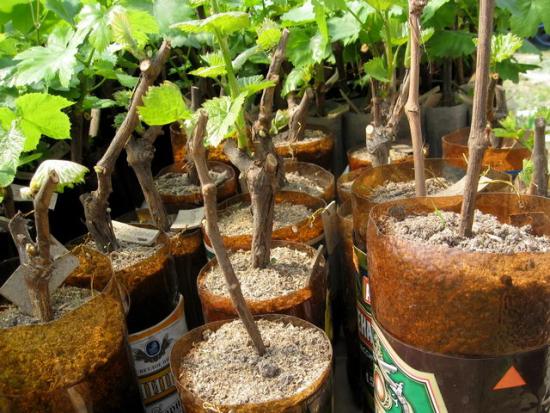
Growing in filler
In this case, the sawdust is prepared in advance:
- pour boiling water over
- leave until cool
- squeeze out excess water
Then they are poured into a pot or container in a layer of several centimeters, the cuttings are installed, turning the buds upward. Next - the second layer and cover the container with film. Once every three to four days, moisten the sawdust. After two weeks, they check for the presence of roots, those cuttings where they already exist are moved into the ground for growing, the rest are returned to sawdust.
For growing, soil from the mixture is suitable:
- sand
- land
- mature humus
When transplanting into the ground, no more than two shoots should be left on the cuttings. The cuttings are planted in a permanent place in early June. The listed methods for growing cuttings at home are suitable for relatively small quantities. There are other methods for mass production of grape seedlings.
See how to grow grape seedlings from cuttings:

Interesting information about the vegetable garden