Juniper: propagation by cuttings, layering, grafting
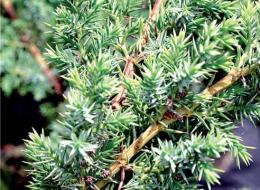
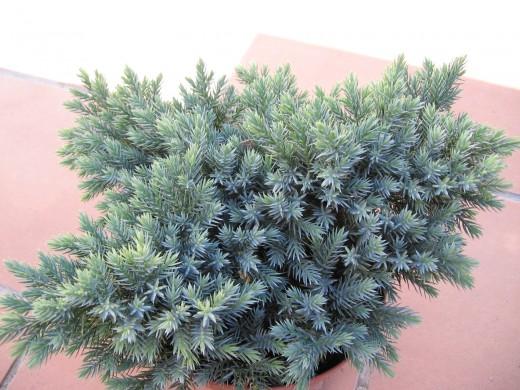
Juniper is a bright representative of evergreen plants belonging to the cypress family. Its decorative effect, variety of shapes, abundance of colors, and unpretentiousness have made it a favorite plant of many amateur gardeners. Therefore, the issue of juniper propagation is very relevant.
Content:
- Propagation of juniper by cuttings
- Reproduction of juniper by layering
- Propagation of juniper by grafting
Propagation of juniper by cuttings
Cuttings are a universal method of propagating all varietal forms of juniper. If optimal conditions for rooting are provided, plant cuttings can be carried out throughout the year, but spring is considered the best time:
- In this case, the roots will appear before the end of summer, and the young plant can easily overwinter in open ground. It is also a good idea to cut off planting material in July-August, when the young shoots have time to ripen and become lignified. However, in this case, the cuttings do not have time to form roots before winter, so they can only overwinter indoors or under good cover.
- Preparation of cuttings It is better to produce in cloudy weather, since the sun's rays can have a negative effect on both the planting material itself and the adult juniper from which it was cut.
- For cuttings, it is better to use the tops of semi-lignified shoots.Depending on the juniper variety, there are some peculiarities in collecting planting material. So, in columnar and pyramidal varieties, only vertical, upward-directed shoots should be cut for cuttings. For creeping varieties, the best planting material will be any shoots, but not vertical ones. If you need to propagate juniper with a spherical or bush-shaped crown, then you can cut off any shoots.
- The shoots should be cut with a sharp knife along with the “heel” (a piece of older bark and wood formed at the point where the shoot attaches to the main branch). Cut shoots must be freed from twigs and needles to a height of 3-4 cm from the “heel”, since it is in this area of the stem that the root system will form. It is important to remember that cut shoots cannot be stored. If it is not possible to plant them immediately after cutting, you can keep them in a container with water for 1-3 hours or wrap them in damp burlap and place them in the refrigerator.
- Some gardeners recommend prepared cuttings Before planting, soak in root formation stimulants. However, this should not be done, since juniper has very delicate bark and in water it can peel off, which will result in a decrease in the overall productivity of the harvest. It is more advisable to plant the planting material in the substrate and then water the soil, for example, with sodium humate or heteroauxin. This will significantly speed up the formation of roots.
The substrate in which the cuttings will take root must be loose and permeable. A mixture of coarse river sand and peat, combined in equal proportions, works well.It must be remembered that juniper grows better in acidic soils, so you should not add deoxidizing additives (egg shells, ash, etc.) to the rooting substrate.
It is better to plant cuttings in wooden boxes filled with substrate, but it is important not to forget about drainage holes and drainage. The cuttings should be immersed in the soil to a depth of 3 cm at an angle of 60 degrees.
Place the boxes with the planted cuttings in a dry, warm greenhouse, in which optimal climatic conditions must be maintained: high air humidity, diffused light and air temperature before buds open – 16-19°C, after buds open – 23-26°C. Direct sunlight is harmful to juniper shoots, so if the greenhouse is in the sun all day, it is necessary to apply shading.
Caring for cuttings during rooting involves regular watering and spraying. In order to maintain the required humidity in the greenhouse, plants should be sprayed at least 5-6 times a day. The soil should be watered as it dries, but in no case should it be too wet, since juniper does not like excess water.
First roots on cuttings appear 50-90 days after planting. There is no need to rush to replant the seedlings, as the first roots are very thin and can easily be damaged during replanting. It is advisable to leave the seedlings in the greenhouse for another year so that the root system grows and becomes stronger. If this is not possible, then the seedlings should be transplanted very carefully, taking them out together with the earthen ball and moving it with it into planting holes at their permanent place of growth.
Reproduction of juniper by layering
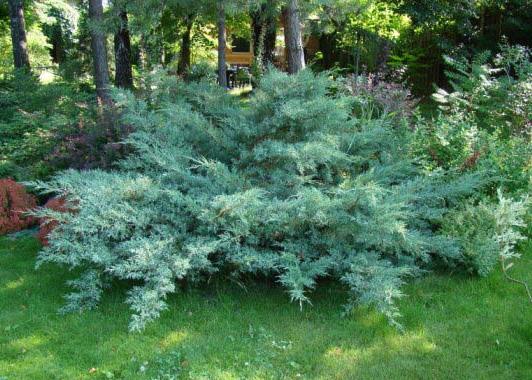
This method can be used to propagate creeping forms of juniper. This can be done throughout the growing season. For propagation by layering, it is advisable to use young, newly matured branches, since lignified shoots take a long time to take root and do not take root well.
Directly before breeding layering requires preparing the soil around the plant. To do this, it should be dug up, loosened, fertilized with acidic peat and river sand and moistened. The branches selected for propagation should be cleared of needles at a distance of 10-20 cm from the base of the shoot, pressed with the cleared part to the ground and attached with special pins. Periodically, the pinned shoot should be hilled up and watered.
Juniper cuttings take root within 6-12 months, young shoots are formed on them, which are then detached and transplanted to a permanent place of growth.
Propagation of juniper by grafting
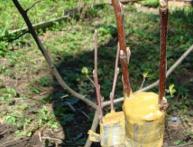
Especially valuable varieties of juniper are propagated in this way. As a rule, the selected valuable variety is grafted onto common juniper. To do this, the cut shoot (scion) is pressed tightly against the rootstock, and the junction is tied with a tape made of transparent plastic film.
The method of reproduction is not widespread among gardeners, since the survival rate of the scion in this case is low.
Watch the video for the intricacies of caring for juniper:

Interesting information about the vegetable garden