Dipladenia: propagation by cuttings, seeds, tendrils at home
Many indoor and garden flowers began to be cultivated after the discovery of unusual beautiful plants in the wild.
From species common in hot climates, through the efforts of breeders, varieties are developed for temperate climates, but almost any plant can be grown as a houseplant or greenhouse plant.
A flower like Dipladenia is no exception.
This representative of the South American continent is grown mainly indoors.
When it is not possible to purchase a ready-made seedling this unusually beautiful plant, the question arises of how to obtain planting material yourself. Under what conditions is dipladenia best suited for reproduction?
Content:
- Description of the dipladeniya plant
- Propagation of Dipladenia by cuttings
- Reproduction of Dipladenia by seeds and tendrils
Description of the dipladeniya plant
During the exploration of South America, Europeans turned their attention to beautifully flowering liana-like plants. The woody shoots had beautiful shiny evergreen oval or heart-shaped leaves.
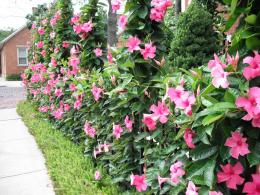
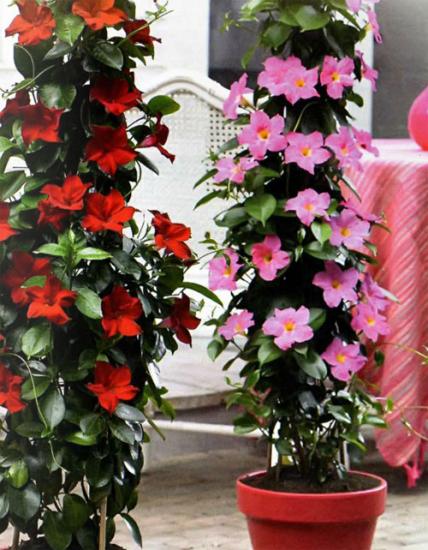
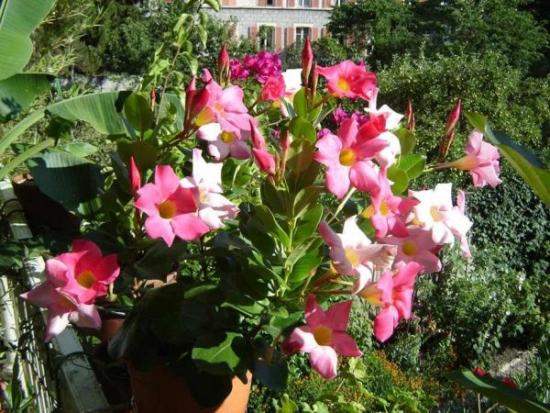
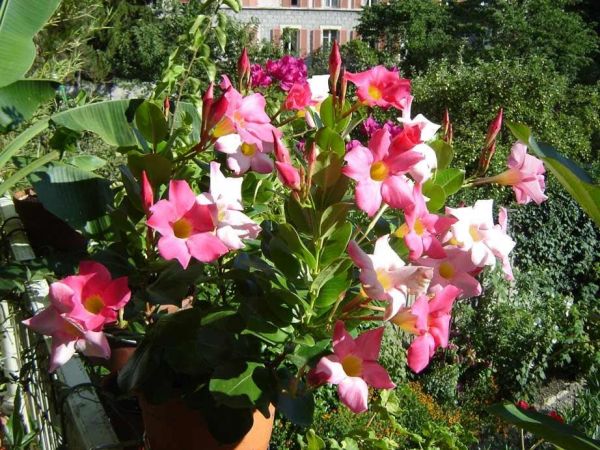
But most of all, the large tubular flowers, more than 10 cm in diameter, attracted attention. There were species with snow-white, pink, dark burgundy and scarlet flowers.
Initially, some species were called mandevilla, in honor of a diplomat from England who worked in Bolivia and was passionate about floriculture.
Later, with a detailed description, some plants were given the second name dipladenia, which meant “two-glandular”, since the stamens had paired honey glands - nectaries.
It is thanks to them that most species of Dipladenia emit a strong aroma to attract pollinating insects.
This is also facilitated by the fact that the vines are literally strewn with a large number of flowers and bloom almost all year round.
In everyday life, dipladenia received popular names:
- Chilean jasmine
- bolivian rose
- Brazilian jasmine
- Brazilian balsam
- mexican love tree
Lovers of indoor flowers are attracted by the rapid growth and abundant flowering by the end of the first year of life.
It blooms in spring and continuous flowering continues until November, and one flower lasts and does not fade for up to 10 days.
You can achieve such flowering if you grow Dipladenia in a well-lit place, but not in direct sun. Throughout the year, the plant feels great at room temperature, and in winter it is advisable to keep it at +15 degrees Celsius.
When grown indoors, the length of the shoots can be adjusted by pruning, but the plant may not bloom.
And given that the length of the vine can exceed three meters, it is best to install a vertical support in the center of the container with dipladenia and twist the shoot around it or grow it in a flowerpot on the wall.
The video will show all the colorfulness of this flower:
Despite the ability for abundant mass flowering, seeds are not always formed, so it is better to propagate dipladenia by cuttings.
Propagation of Dipladenia by cuttings
The optimal time of year for propagating Dipladenia by cuttings is from mid-spring to mid-summer.You can prepare cuttings by cutting off part of the top from a young shoot.
In the spring, young green shoots are suitable for this, and in the summer, cuttings can be taken from more mature, lignified stems.
It is important to remember that the leaves, stems, and roots of Dipladenia secrete a highly toxic milky sap, so you need to work with it with gloves, avoiding getting the sap on the skin and mucous membranes.
Cutting off stalk, you need to make sure that there are two pairs of leaves on it.
It is advisable to treat the lower part of the shoot with a phytostimulant before rooting.
To root cuttings, you will need a soil mixture of equal parts of peat and sand, to which, if possible, add a little dry moss. Fill small cups with the prepared soil.
Before placing the cuttings in them, the soil is well moistened. For quick and successful emergence of roots, the cuttings are buried down to the first pair of leaves and placed in a room where the temperature is not lower than +25 degrees.
If it is not possible to keep cups with Dipladenia cuttings in a small greenhouse or greenhouse, then you can cover each rooting plant with a transparent plastic bag or part of a plastic bottle.
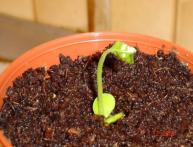
Water sparingly as needed. After about four weeks, the Dipladenia cuttings will have their own roots and it can be transplanted into a pot.
Sometimes rooting in plain water, where the cuttings are located, gives good results. When the roots reach a length of 1 - 2 cm, the cuttings are transplanted into the ground.
As a rule, cuttings take root quite well, but it happens that cuttings from some species, especially double flowers, do not want to form roots and disappear, then you can try to propagate Dipladenia with seeds and tendrils.
Reproduction of Dipladenia by seeds and tendrils
As a rule, the cost of some varieties of Dipladenia is far from budget, but many stores offer seeds of various varieties of Dipladenia. Sometimes indoor flowers can form a seed pod after flowering.
For seed germination, a sufficiently high air temperature of + 22 to + 28 degrees is important. The next condition is properly selected soil with a light texture and slightly acidic environment.
In the container where the seeds were sown, priming should be moist, but without stagnation of water.
Even if all conditions are met, seed germination can take from two to four months, during which time the crops will have to be provided with heat, humidity and light.
Experienced flower growers and lovers of Dipladenia propagate it by tendrils, which regularly appear at the top of the shoots.
This method can be considered as one of the options for propagation by immature cuttings. This can be done by bending the shoot to the ground and pinning it at the place where the tendril forms.
After the roots appear, the new seedling is separated from the mother plant and planted in a separate pot.
Dipladenia is one of the most wonderful indoor flowers; its cultivation, although it requires additional knowledge, is no more difficult to care for than any indoor flower.

Interesting information about the vegetable garden