How to replant baby orchids at home, without roots, rooting the baby

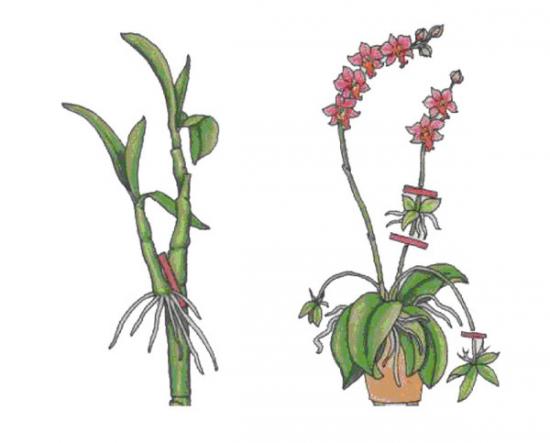
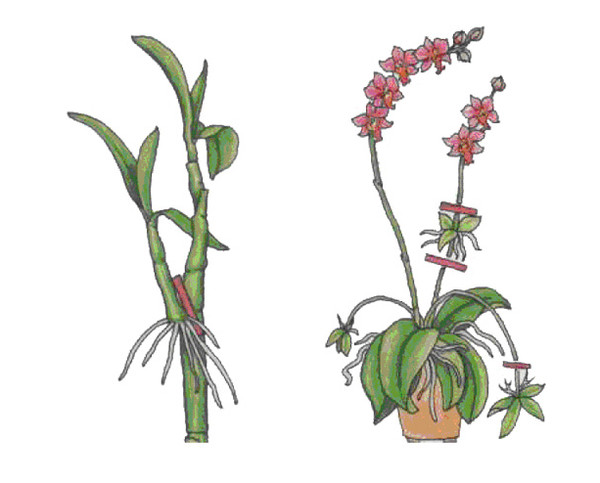
They are quite popular among amateur flower growers in our country. Phalaenopsis And Dendrobiums. These plants have a characteristic feature - the baby is able to develop at the top of the pseudobulb.
This makes it easier to propagate these flowers. The shoots Phalaenopsis can emerge from a dormant bud on a peduncle or at the base of the basal neck. This usually happens after flowering has ended. Most often, a baby is formed from a dormant bud located on a peduncle.
Content:
- Methods of propagation of Phalaenopsis orchids
- How to transplant baby orchids at home, procedure
- How to replant a baby orchid without roots
- How to root a baby
- How to plant the root baby of an orchid
- Is it possible to replant a blooming baby orchid?
Methods of propagation of phalaenopsis orchids
The life cycle of an orchid is similar to that of an ordinary flower, it includes 6 stages:
- bloom
- pollination
- seed formation
- seed ripening
- germination
Pollination is carried out by insects that fly to the smell of flowers. Then the development of seed capsules occurs. The seed pod matures in 6-8 months. When the seeds are ripe, it bursts and the small seeds are dispersed by the wind.
At home, orchids reproduce in 4 ways:
- budding or cuttings – a shoot is formed on the stem of the peduncle
- basal propagation - the formation of a basal shoot occurs when the plant finds itself in a critical situation
- division - an extreme method of propagation, which can even be called barbaric - the upper part of the plant with part of the roots is cut off and rooted, and basal shoots grow on the remaining stump
- sexually or by reproduction seeds - a rather labor-intensive but interesting method of reproduction
How to transplant baby orchids at home, procedure
From the moment of formation to the moment of transplantation, the shoot must undergo a long development. He should get stronger.
The shoot begins its long journey from the dormant buds, which are located on the peduncle. They are covered with thin scales. When the kidney begins to change, it immediately becomes noticeable. The tubercle under the scale begins to increase in size and then turns into a stalk or a new peduncle with buds. Most often, flower stalks grow from the buds, but sometimes shoots appear from them.

The roots on the new stem do not begin to grow immediately. The leaves appear first. After some time, when the stem becomes 7 centimeters long, the time comes for the roots to form.
You don’t need to do anything with the baby while it is on the stem of the peduncle. It is necessary to monitor its development and measure the roots. The shoot takes an average of 6 months to fully develop.
When the roots reach 5 centimeters in length, the plant can be transplanted.
To separate a young shoot you need to be careful and attentive. Before separating the baby from the mother plant, you need to prepare the necessary materials. A new flower requires new soil.
To transplant orchid shoots into soil, its components must be finely crushed and mixed evenly.
To prepare a high-quality soil mixture you will need:
- 5 parts pine bark
- 1 part moss
- 1 part charcoal
- pumice or expanded clay for drainage
The composition of the substrate can be simplified:
- 1 part charcoal
- 5 parts pine bark
Separation of the shoot is usually carried out according to the following scheme:
- Prepare some moss and a transparent pot, this will allow you to monitor the condition of the soil and water the plant in time. The container must be washed and sterilized well.
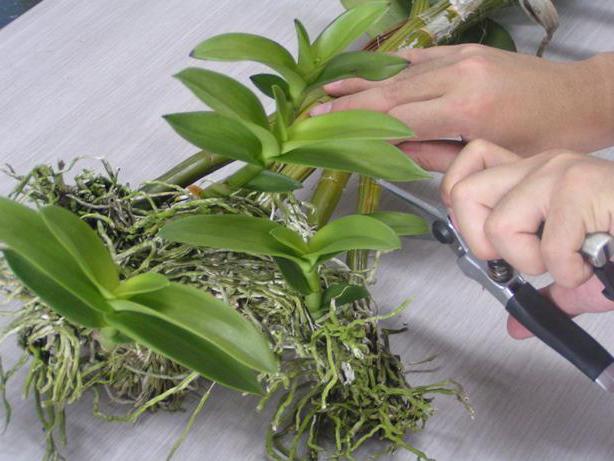
- A sharp knife, pruning shears or scissors are suitable for cutting. They must be sharply sharpened so as not to injure the baby during cutting. Before cutting, the tool must be disinfected so as not to infect the plant with pathogens.
- Crushed activated carbon should be used to process sections.

Procedure:
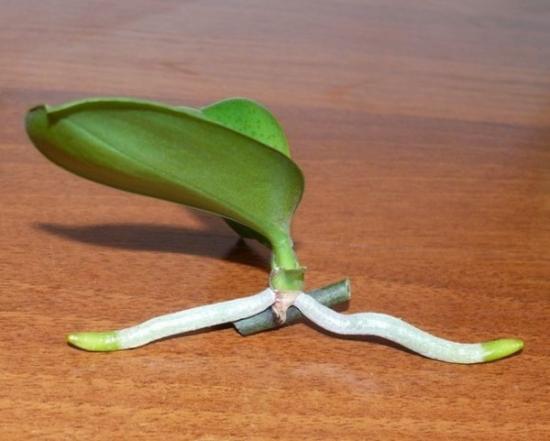
- When separating the baby, extreme care must be taken. Sometimes a young plant is separated from the peduncle - this is incorrect and can lead to the death of the shoot. It should be properly separated with a part of the peduncle a couple of centimeters from the growing point at the top and bottom.
- All sections must be treated with crushed activated carbon or any other bactericidal agent. Sections must be disinfected immediately after cutting.
- The separated shoot should be left to dry for half an hour.
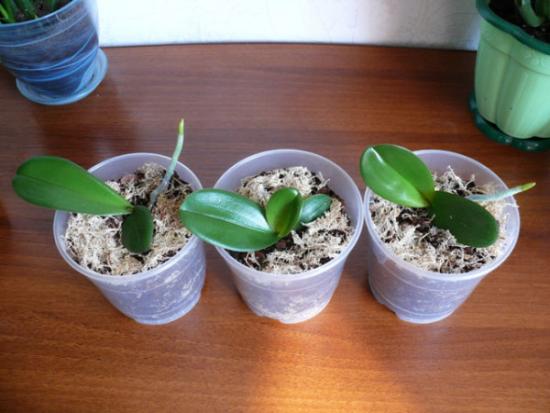
- After this, the new plant is strengthened in the prepared soil. This must be done carefully so as not to damage the roots.
- When starting to plant young orchid sprouts, you need to know that you cannot fill the soil with soil until the flower is strengthened in the pot. This can damage young roots.It is not necessary to immediately plant the shoot in a large container; it does not need a large pot for full development.
- First of all, you need to lower the roots into the container and carefully straighten them. After which you can carefully add soil. The shoot should be positioned so that the growing point is flush with the edge of the pot. Lightly tapping the walls will help the soil settle.
How to replant a baby orchid without roots
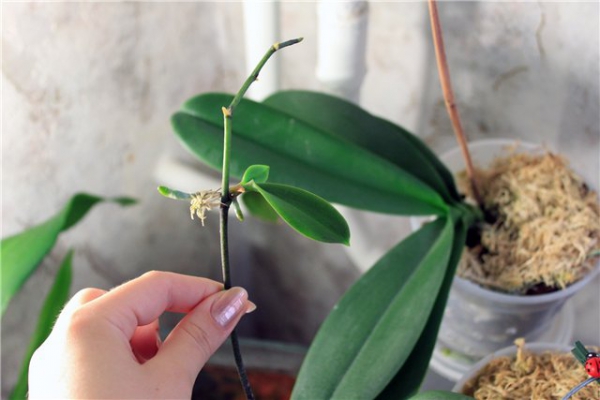
It often happens that the shoot that appears on the peduncle does not develop roots, but it is time to plant it. To plant a new plant, you need to remove the covering scales from the base of the rosette. They hide the rudiments of roots underneath.
Such a sprout cannot be planted in the bark. Due to the lack of roots, it will not be able to receive moisture in the required amount. In this case, you will have to grow the roots in the air. Exactly - in the air! But it should be practically tropical - warm and very humid.
To do this you will need to make a small greenhouse. To build it you will need a plastic cup. First, you need to make several holes in its bottom.
They are needed to remove excess moisture through them. You need to put expanded clay or pebbles at the bottom of the cup. This will give greenhouse sustainability. You need to lay some moss on top of the pebbles and moisten it. One and a half centimeters from the top edge it is necessary to make holes for support. It is necessary to secure the rooting shoot to it. It should seem to hang in the air and not touch the moss.
In some cases, when a young plant has large leaves, it is quite possible to do without using a support. It will be kept in suspension with the help of its leaves. The entire structure must be covered with a cut plastic bottle.It should be light to ensure good light transmission.

If you don’t have a plastic bottle on hand, you can use a plastic bag. You need to make several holes in it, thanks to which ventilation will be provided.
The resulting greenhouse should be left on a bright windowsill and wait for the roots to grow. The plant can be planted in substratewhen the roots are 7 centimeters long.
How to root a baby
There are several ways to root orchid shoots.
- the method of rooting in a greenhouse was described above;
- rooting with moss - live sphagnum is used for this method. The shoot must be laid on top of it. To protect the plant from dry air, a plastic cake box is perfect. In this case, you will need minimal care - spray the moss 1-2 times a month;
- rooting using polystyrene foam is a rather interesting method. You need to make a hole in the foam. Mark the baby in it and lower the foam into the water, but in such a way that the base of the flower rosette does not touch the liquid. The humidity around the plant will be sufficient if the container is deep enough. If the depth of the container is insufficient, it can be covered with glass or a transparent bag. The roots begin to grow due to their close proximity to water. When the roots appear, the plant can be planted in a pot and periodically spray the soil near the base of the child;
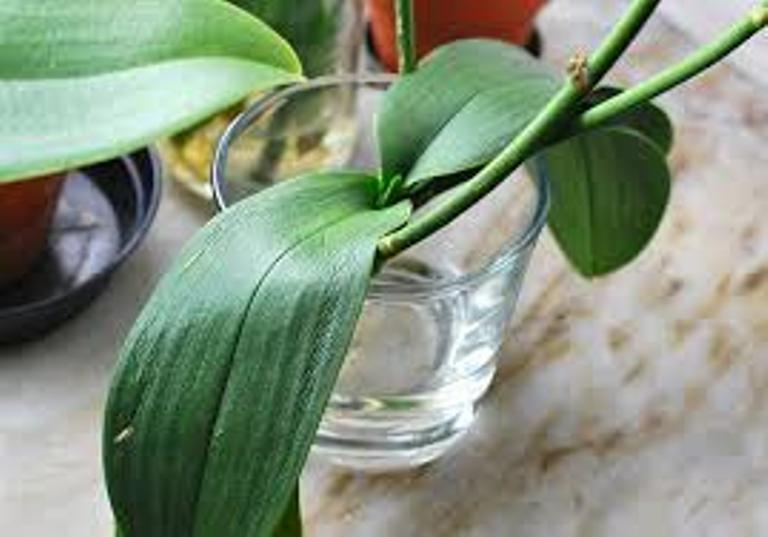
- rooting in water does not fully guarantee the appearance of roots, but it can still be used. To do this, you need to leave the rosette in water for several days, placing the lower part of the plant shallowly in the liquid. When the beginnings of the roots appear, the shoot can be planted in moss.
How to plant the root baby of an orchid
When a plant finds itself in an extreme situation, a basal shoot grows on it. This is due to the fact that phalaenopsis trying with all its might to continue its life cycle. But the orchid will not bloom.
The formation of root children occurs at the bottom of the trunk. Initially, it looks like an ordinary peduncle, but after a couple of weeks it will be possible to understand that it is a baby.
In the scientific literature, the root baby is called basal, which once again confirms that it is completely dependent on the mother plant. She needs a similar care. This plant has no roots of its own. When dividing plants, one of them will die most quickly.
This situation is controversial. Most flower growers are inclined to believe that dividing plants is only possible if the mother plant has a diseased root system.
Due to the fact that the new growth point is too close to the main one, when they are separated, one of the plants will end up damaged.
The appearance of a root baby occurs when the mother plant is damaged. A baby on the trunk may appear when the orchid produces a peduncle directly from the growing point. The flower loses the ability to grow new leaves and forms a basal child.
Is it possible to replant a blooming baby orchid?
In this case, it all depends on what this baby is needed for. If you need a new copy orchids – the peduncle needs to be removed. This way the young plant can receive more nutrients. When the roots of the shoot grow to 5-10 centimeters, it can be planted.
If you want to enjoy lush flowering, you can leave the peduncle.We must not forget that during flowering the roots will outgrow and this will not allow separating the young plant from the mother flower and planting it in an individual pot, without causing serious injury to the root system.

Growing orchids at home is beautiful, but also troublesome. And how many positive emotions there are when the planted shoot throws out a peduncle and begins to bloom. This is simply amazing!
You will learn more about how to separate a baby phalaenopsis orchid by watching the video:


Comments
We tried to propagate it, but it didn’t work out, it’s a very whimsical flower. And they die very, very often. And it is very expensive. So we no longer reproduce or buy.
In our house, the phalaenopsis orchid has been growing for more than five years and, unfortunately, the second flower stalk never grows. It always appears alone and beautiful white flowers bloom on it for a long time. Perhaps, in order for the second peduncle to appear, some other measures need to be taken?
No matter how much I tried, both to propagate and grow from a grain, nothing worked. Perhaps the orchids don’t want to grow on me. The last purchase was a mini orchid. But for some reason it didn’t “take root” again. It's a shame, because the flowers are very beautiful.