Calla: home care and planting features
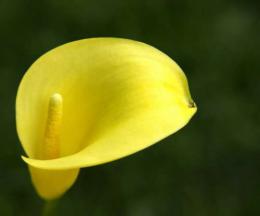
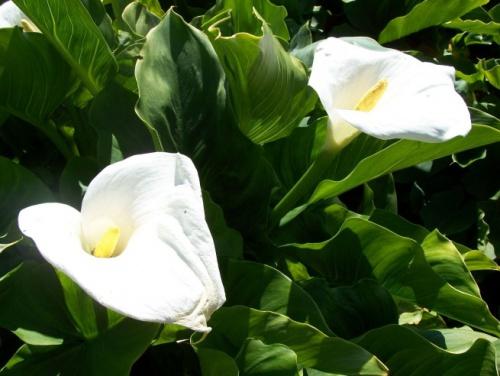
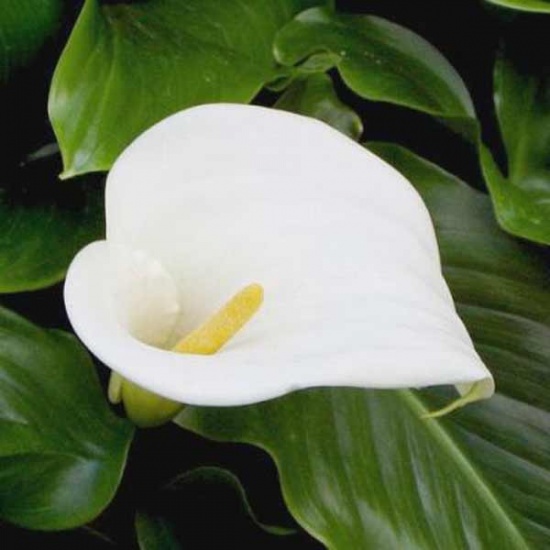
Calla is the most famous flower of the araceae family. Breeders have developed new varieties that are short in height and have different flower colors. Calla lilies are unpretentious plants, but in order for the flowers not to become small and remain bright, you need to know all the intricacies of care.
Content:
Planting Callas
The technology for planting Calla lilies is no different from planting other tuberous indoor plants. In order for Calla to delight with beautiful and bright flowers, you need to choose the right planting material.
High-quality planting material:
- Tubers are smooth, juicy and large.
- If the planting material is in a package, the package should be filled with sawdust.
- Each tuber must have a bud.
- The skin of the tuber should be evenly colored and not damaged.
- It’s good if the tubers are grown in local climatic conditions, then you don’t have to worry about problems with adaptation.
It is better to choose a large pot for Calla lilies; this plant does not like cramped conditions. Optimal pot size: height from 50 cm, diameter from 40 cm. With good nutrition and proper care, the flower grows very quickly.
Be sure to place a drainage layer of expanded clay or pebbles on the bottom of the pot. When choosing soil, it is better to give preference to a nutrient mixture of turf, compost and leaf soil in equal proportions.
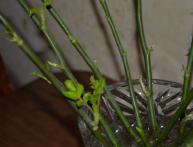
Before planting, you need to soak the tubers in a weak solution of manganese to reduce the risk of rotting. Often after soaking, defects in the tubers become visible. If there are growths or dry rot, you can clean it with a knife and disinfect it with brilliant green.
Large tubers are buried to a depth of up to 12 cm, small ones up to 6 cm. If you plant a tuber higher than 4 cm, then problems with lodging of leaves will arise. After planting, the pot is covered with film to maintain heat and humidity.
Calla breeds dividing tubers or seeds. When dividing a tuber, it is advisable not to use sharp objects; it is better to break it off with your hands. Fresh places are sprinkled with coal or lubricated with brilliant green. After green shoots appear, remove the film and place the pot on the windowsill. Caring for Calla is quite simple, but requires knowledge of some points.
Features of caring for Calla

In order for Calla to delight you with beautiful and large flowers, you need to know some features:
- Callas love warmth and diffused light. It is better if the light falls in the afternoon.
- IN growing season It is important to maintain soil moisture and maintain regular watering.
- A mature plant requires moderation in watering and is done only if the top layer of soil is dry.
- White Callas love moisture more than colored ones.
- Callas love moist air. You can place the pot in a tray and pour 2-3 cm of water into it. Top up as it evaporates. At temperatures above 20 degrees, Calla needs to spray the leaves.
- Calla is afraid of drafts. During the rest period, the pot can be placed in the pantry or basement. Calla feels good at a temperature of 14-16 degrees.
- Calla will reward you with large flowers for regular fertilizing.You can use both special fertilizers and flowering stimulating agents.
- The top layer of soil needs to be changed every 3-4 months. It is recommended to add nutrient mixtures. You can make a depression along the edge of the pot and pour food into it.
Some gardeners claim that Calla drops leaves. Others claim that the plant remains green all the time. Which one is right? Mostly colored plant varieties shed their leaves; white Calla most often retains its greenery.
Diseases and pests
Of all types of diseases, Calla is most often attacked by gray, brown and bacterial rot. Fungal infections are less common:
- Gray rot. This disease affects the entire plant and looks like a dirty film. The cause of gray rot is most often contaminated planting material, soil, water or proximity to diseased plants.
- In addition to gray rot, Calla can get brown rot. It affects the entire plant, from leaves to roots. Brown rot occurs from excess moisture and high levels of nitrogen fertilizers. To get rid of brown rot, you need to stop watering, lower the temperature in the room and, if possible, remove the wet layer of soil and add dry soil.
- Bacterial rot. This rot is classified as wet. Manifests itself in the darkening of peduncles, roots and parts of leaves. Bacterial rot is practically untreatable. It is necessary to remove all damaged parts of the plant. To prevent bacterial rot, tubers must be disinfected.
- Anthracnose. This is a fungal disease of the plant. Appears as brown spots on the leaves. Later, the edge of the spot becomes purple and the center becomes light.Treatment of Calla for anthracnose involves removing diseased leaves and treating with fungicides.
If the Calla leaves are curled and a sticky coating is visible on them, then most likely it has been attacked by pests. Calla's favorite pests are mites and aphids.
To remove aphids, you can spray the plant with a solution of laundry soap or place the plant in a basin and wash it thoroughly with soapy water. If soap does not help, then you should use a special preparation, for example, Bison, Biatlin, Antitlin.
The cause of spider mites is dry air and temperatures above 24 degrees. The first sign of a spider mite: yellow spots on the leaves. Later, uneven dried areas appear on the leaves. The fight against spider mites involves treating the leaves with Molniya, Vertimek or Fitoverm.
Calla is a sophisticated and elegant flower. Discreet, delicate flowers and large lacquered leaves have won the hearts of millions of gardeners. Proper care and created conditions will make Calla the main decoration of any window sill.
Watch how to grow calla lilies in the video:

Interesting information about the vegetable garden

Comments
I have several of these flowers at home, they are very beautiful, but at the same time you need to take care of them carefully. They get sick with me very often.